Pre-Arrival Campaign
The pre-arrival campaign is a strategic initiative in the hospitality industry designed to elevate the guest experience from the very beginning. This campaign is executed before guests' actual arrival, typically during the booking confirmation phase. Its primary goal is to build anticipation and engagement, ensuring guests feel valued and excited about their upcoming stay. Pre-arrival campaigns may include personalized welcome emails, informative guides about local attractions, and offers for enhancing their stay. By proactively reaching out to guests, hospitality establishments can set a positive tone, address any potential concerns, and lay the groundwork for a memorable and seamless experience, ultimately fostering guest loyalty and positive reviews.
How To Create A Pre-Arrival Campaign
Go to "Marketing" -> "Campaigns".

In the "Campaigns" section, click on "+New" button. A modal appears on the screen.
Select Campaign Guided Creation.
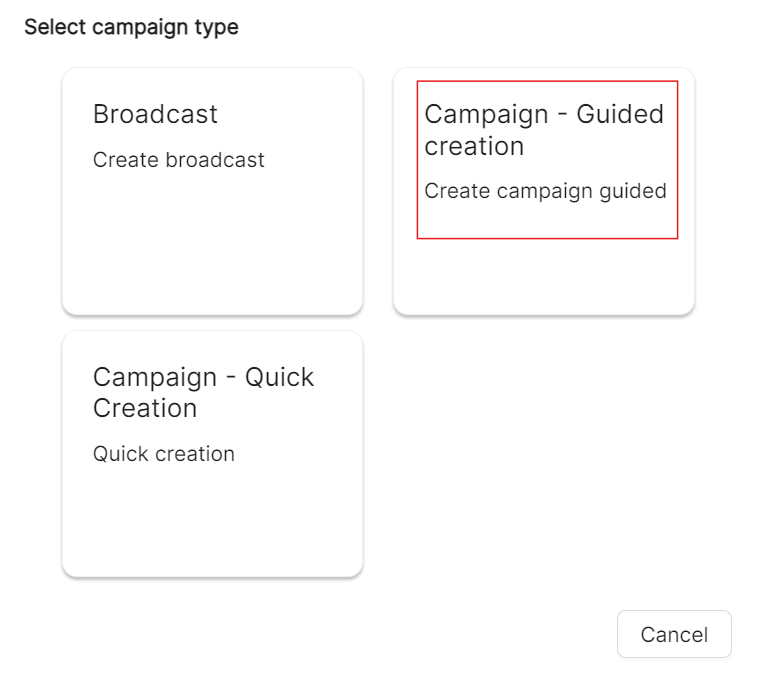
A 4-page wizard appears - Setup, Plan, Responses, Simulate.

Setup Page
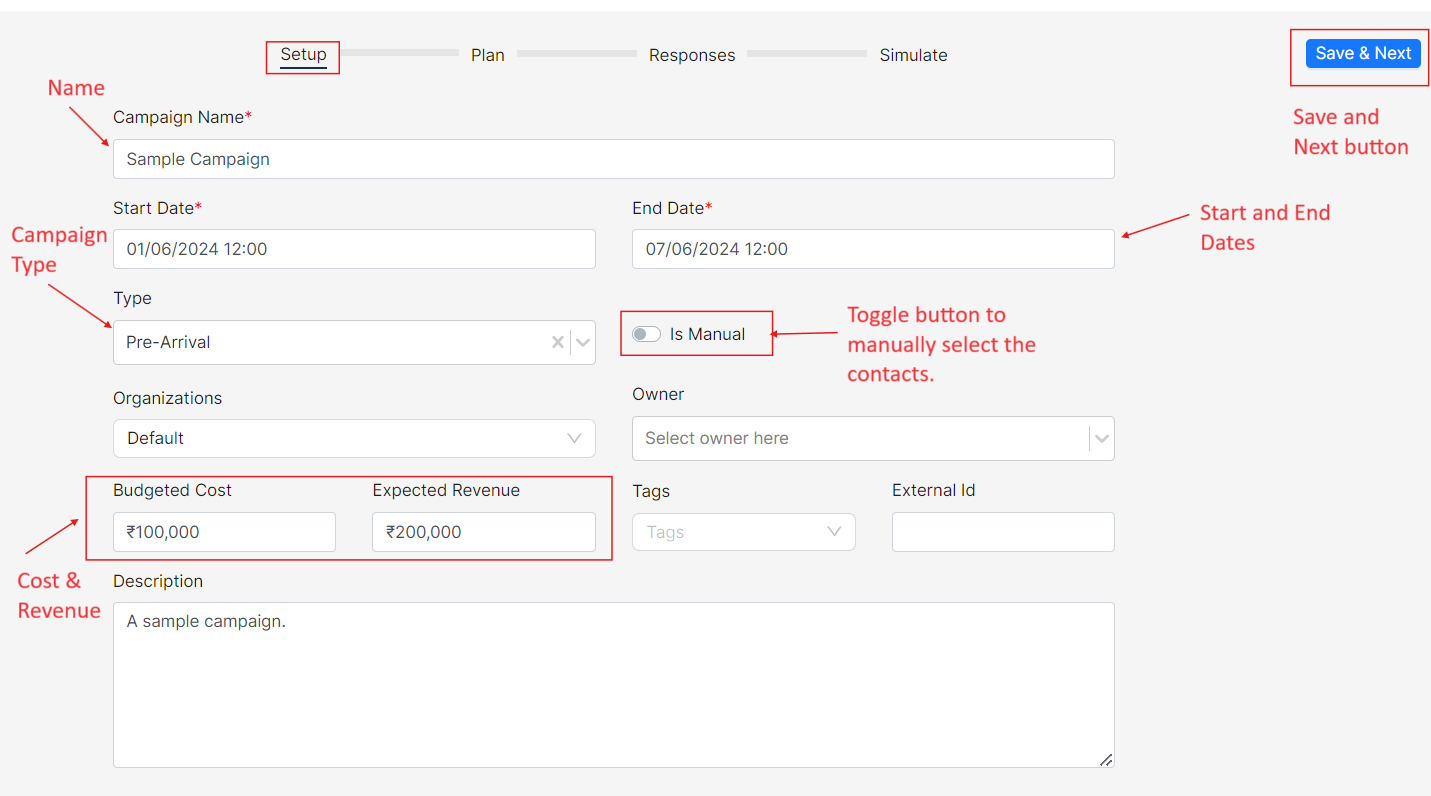
In the Setup page,
- Enter the name of your campaign(mandatory). Always make sure to give relevant names for better understanding.
- Enter the Start Date and Time along with the End Date and Time for your campaign.
- Here, you can decide what type of campaign you want- a pre-arrival campaign, default campaign or post-arrival.
- Select "Pre-Arrival" as the campaign type.
- Enable the ‘Is Manual’ toggle button if you want to manually select your contacts from the target group.
- Enter the Budgeted Cost of the campaign and also the Expected Revenue which you will get from the campaign.
- Fill the required fields and click on "Save & Next".
Plan Page
- In the Plan page,
- You can either add the target groups and templates that you've already created, or you can also create new ones here.
Target Groups
Click on "+", here you can either select an Existing Group or create a New Group.

For the purpose of this demo, let us select the Existing Group.
A form appears with the list of existing target groups.
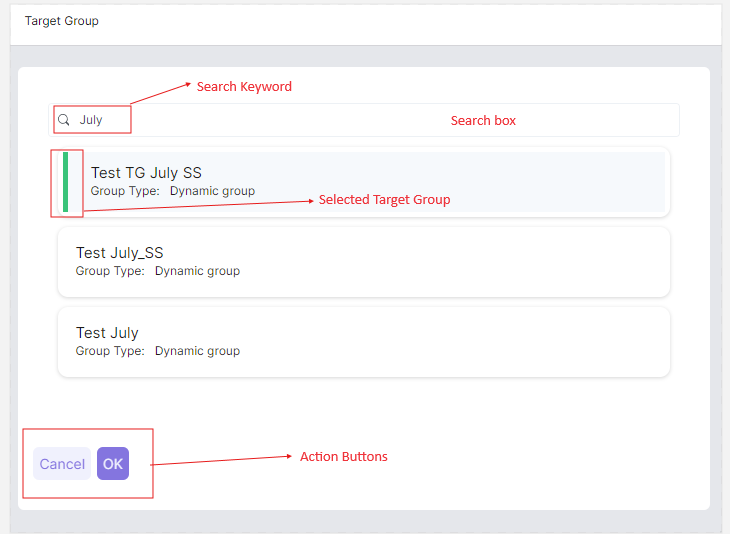
Search for a Target group you want. Select your desired target group and click on "OK".
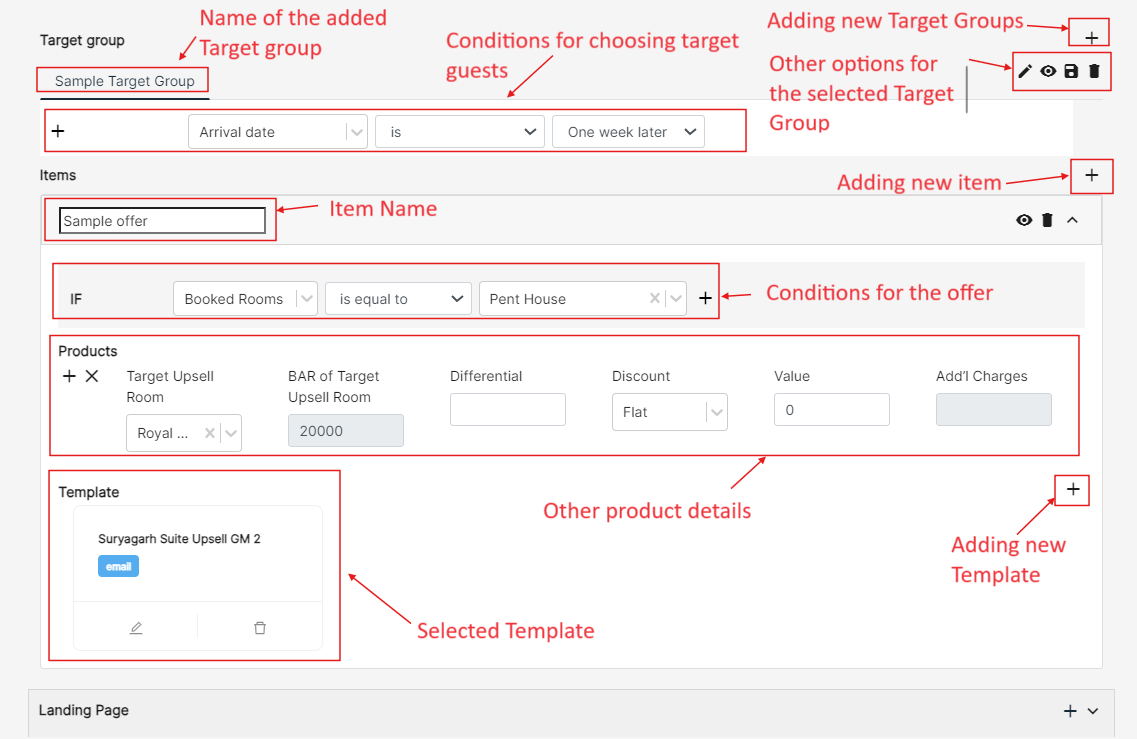
Once the target group is added, you can see a tab named "Items" click on "+" and add the item name.
Click on the ‘drop-down’.
Templates:
Here, you can give a name to the offer you are about to add or create a new one. Then click on the drop-down.
Since this is a Pre-Arrival campaign, here we give the condition as, IF Arrival date is, and select the date from the calendar.
Click on "Add Products", and enter the necessary details of your hotel rooms (if you want to upsell your room to the guests).
Click on the "+" icon near Templates to add "New/Existing Templates". Click on "Existing Templates".
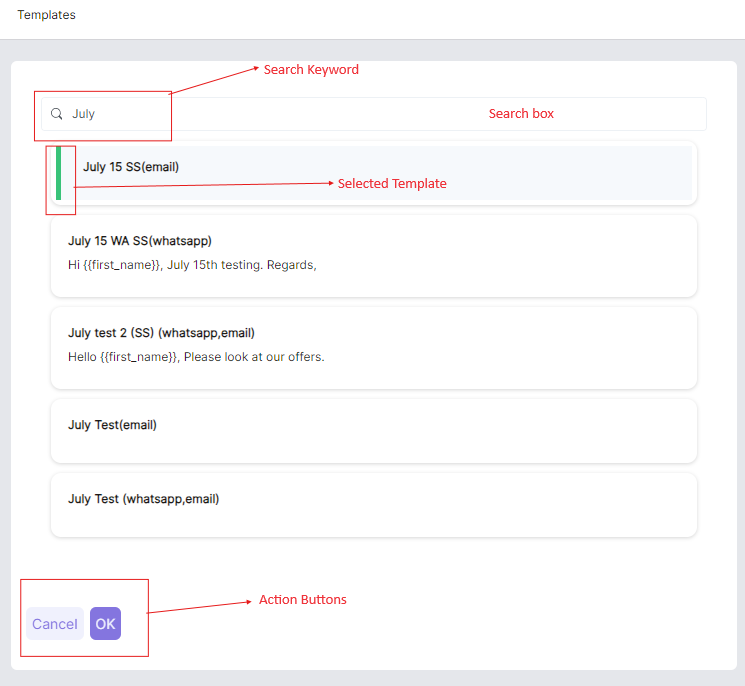
All the existing templates will be listed down. Search with a keyword to find an existing template..
Select any one of the templates from the form that appears.
Click on "Okay" and the template will be added.
Select Landing Pages
Choose an appropriate landing page for your campaign.
You can also customize the landing pages supported by Ephanti. Ensure that the landing pages align with the campaign's theme and objectives.
Steps to select Landing Pages:
Navigate to the Landing Pages section.
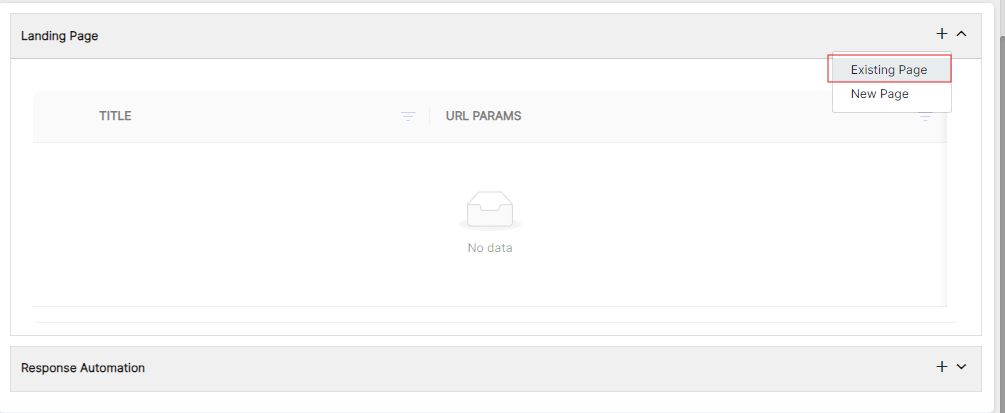
Click on the "+" icon to see existing landing pages.
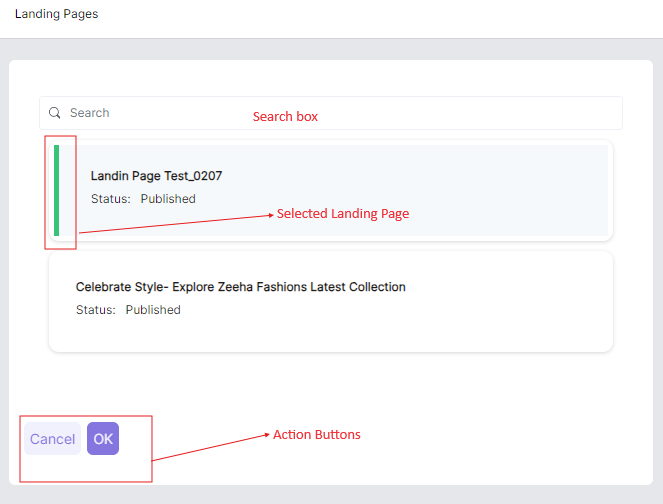
Select the required landing pages like "Accept" and "Reject" from the menu to link it to your campaign. Click "Ok".
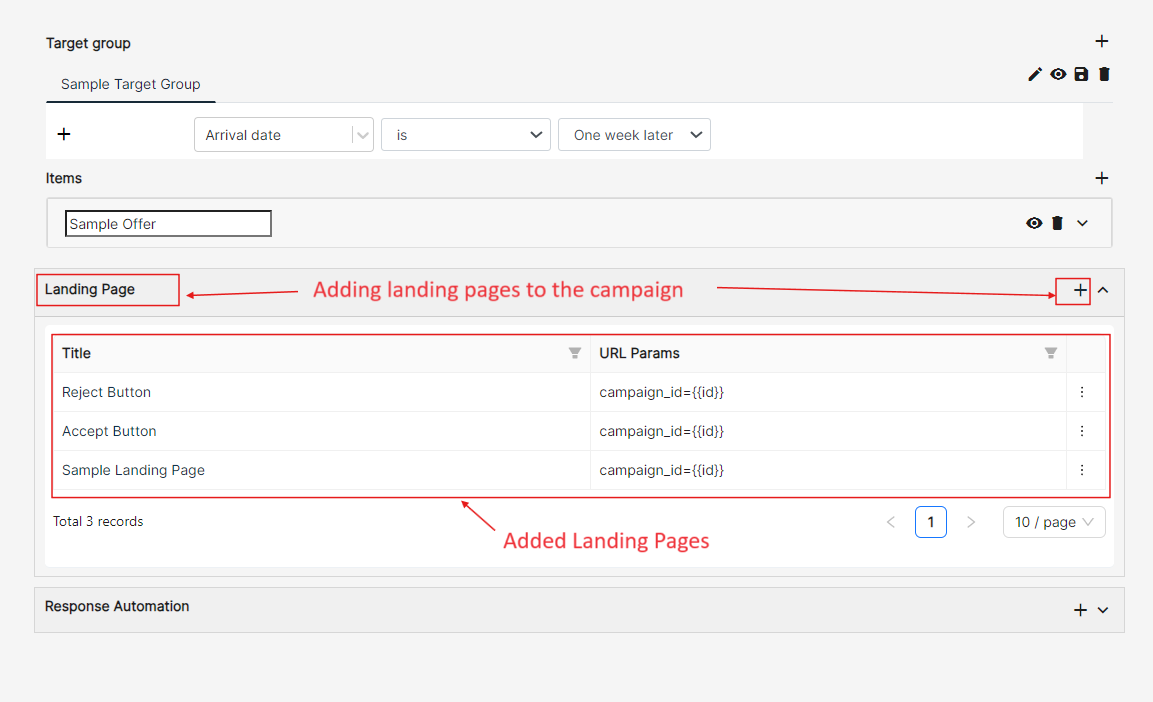
Selected Landing Pages will be added to the Campaign.
Associate Existing Landing Pages:
This feature allows users to use existing landing pages quickly and efficiently by utilizing pre-designed templates. This process ensures consistency, saves time, and helps maintain high-quality standards across all campaigns.
Steps to Associate Existing Landing Pages:
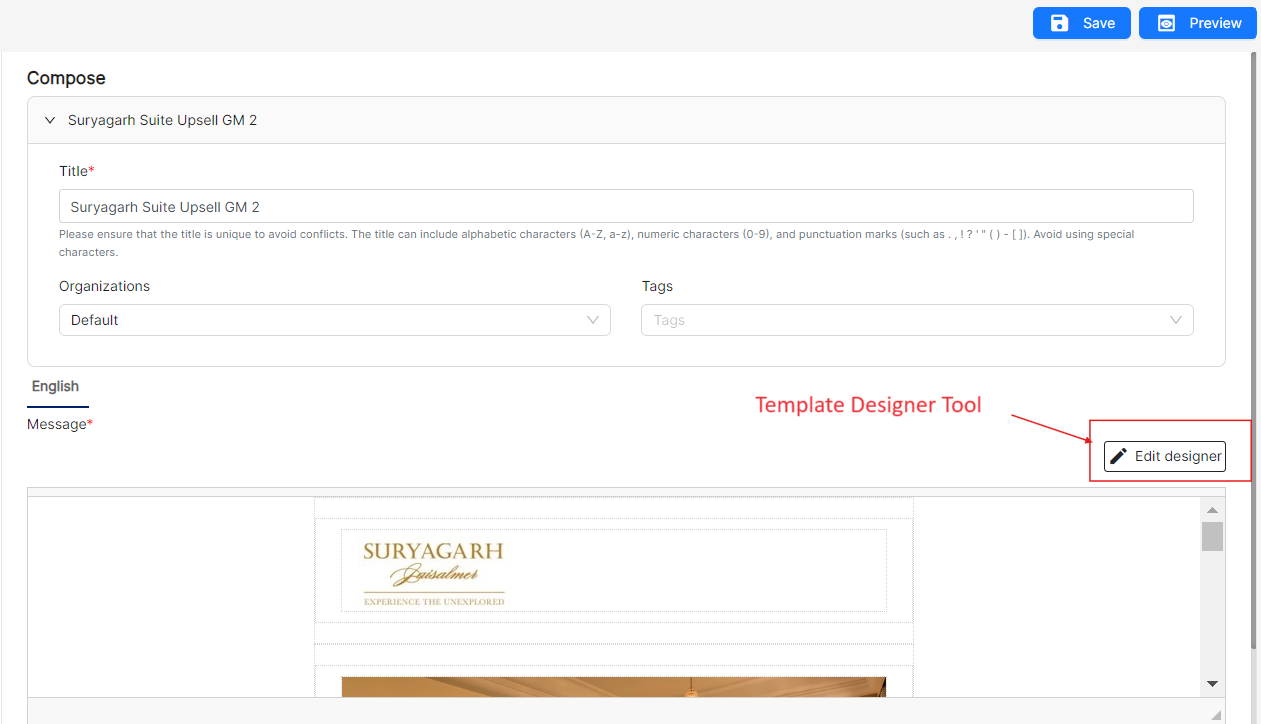
Go to the section where you can edit templates for your campaign.
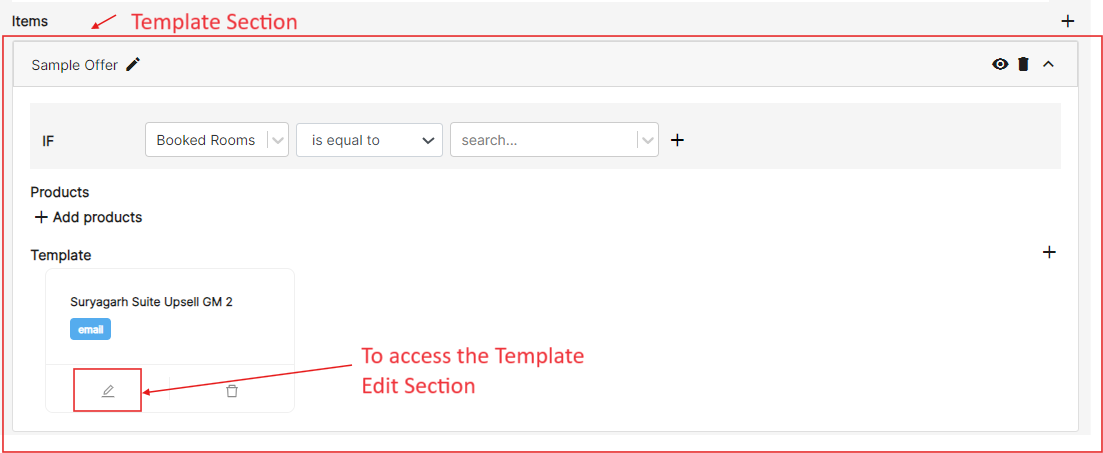
Find and open the "Edit Designer" within the editing section.
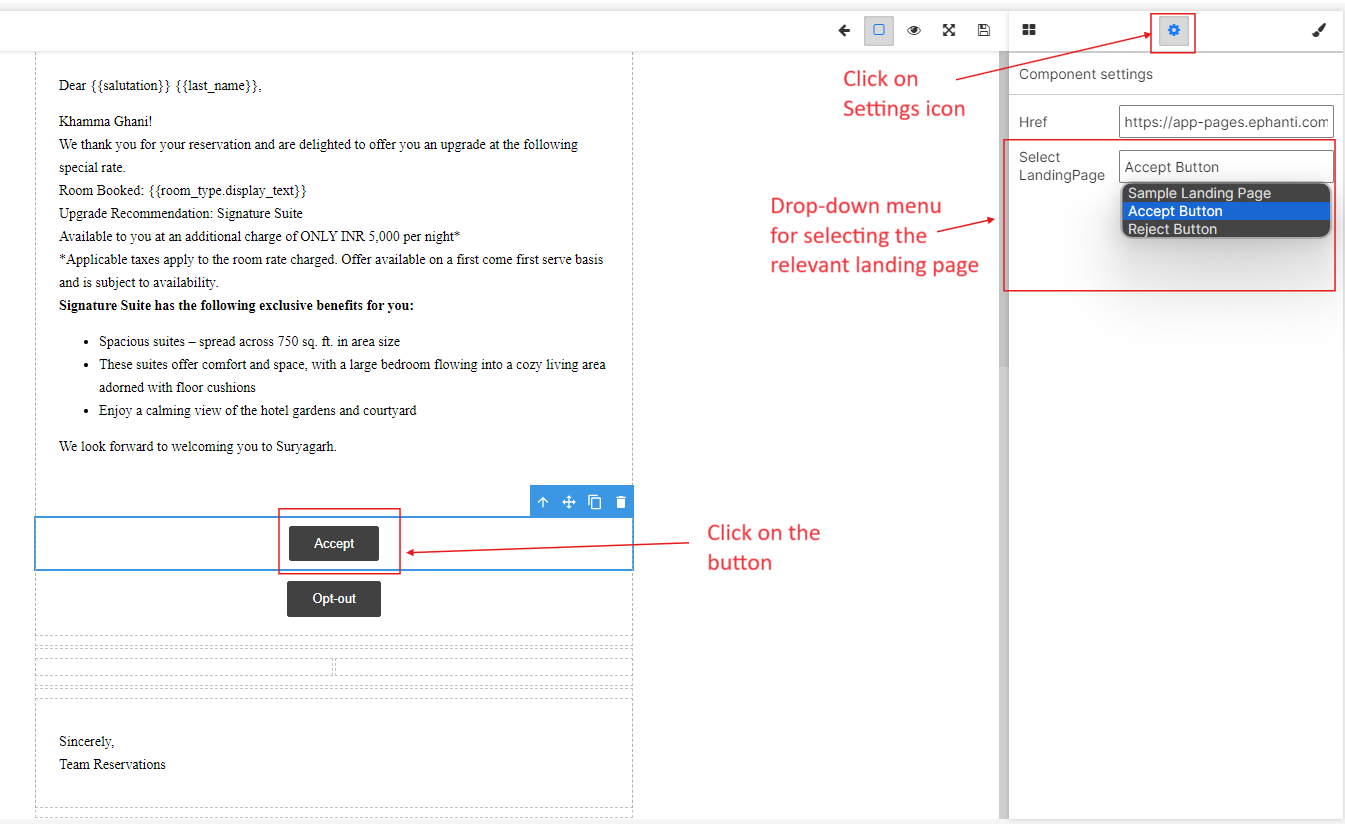
Click on the block icon and drag and drop the "Accept" and "Reject" buttons into the template. Note: Accept/Reject buttons can be added to a template only when it is being used in a campaign.

Click on the "settings" icon in the Template Designer to select the landing page options.
Select landing pages for both "Accept" and "Reject" scenarios.
Add template literals - Add Product literals from the edit template design.
Click on template literals.
Scroll down in template literals.
Find the product option at the bottom.
Select the product literals to add them to the template.
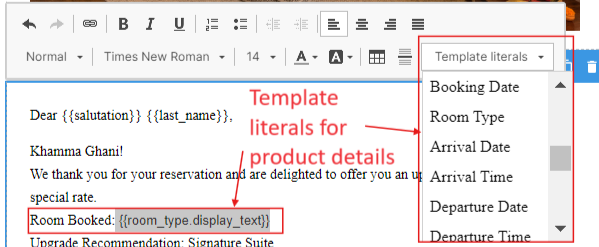
Click on "Save".
Response Automation
Choose an appropriate response automation for your campaign. You can also customize the response automation supported by Ephanti. Ensure that the response automation aligns with the campaign's theme and objectives.
Steps to Set Up Response Automation:
Go to the response automation section.
Select "Campaign Response Flow" from the list. This will link your campaign to the response automation.
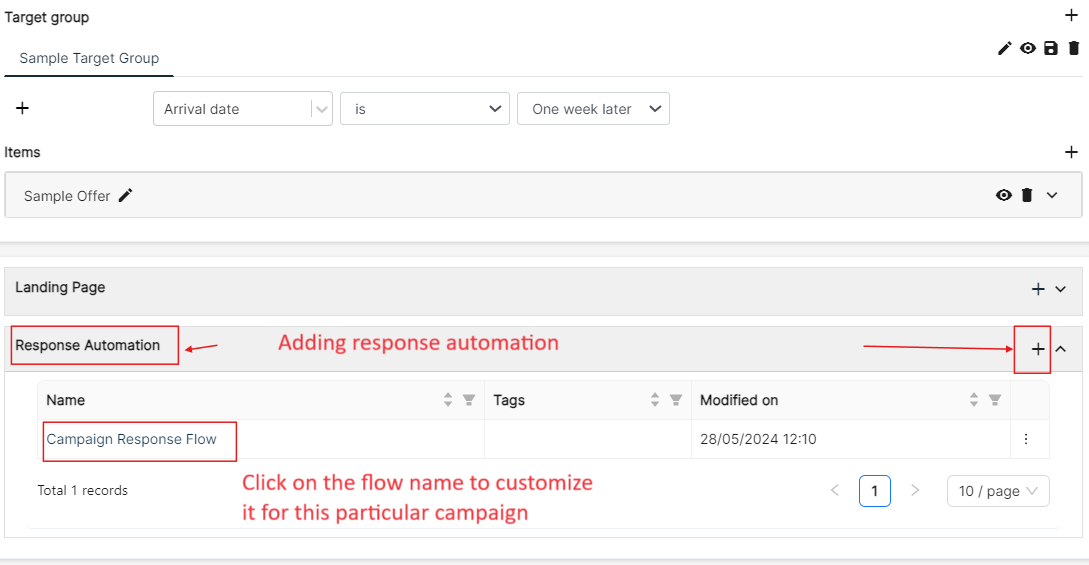
Find and click on the name of the campaign you want to configure.
Click on the node named "Campaign-Pre Arrival Demo".
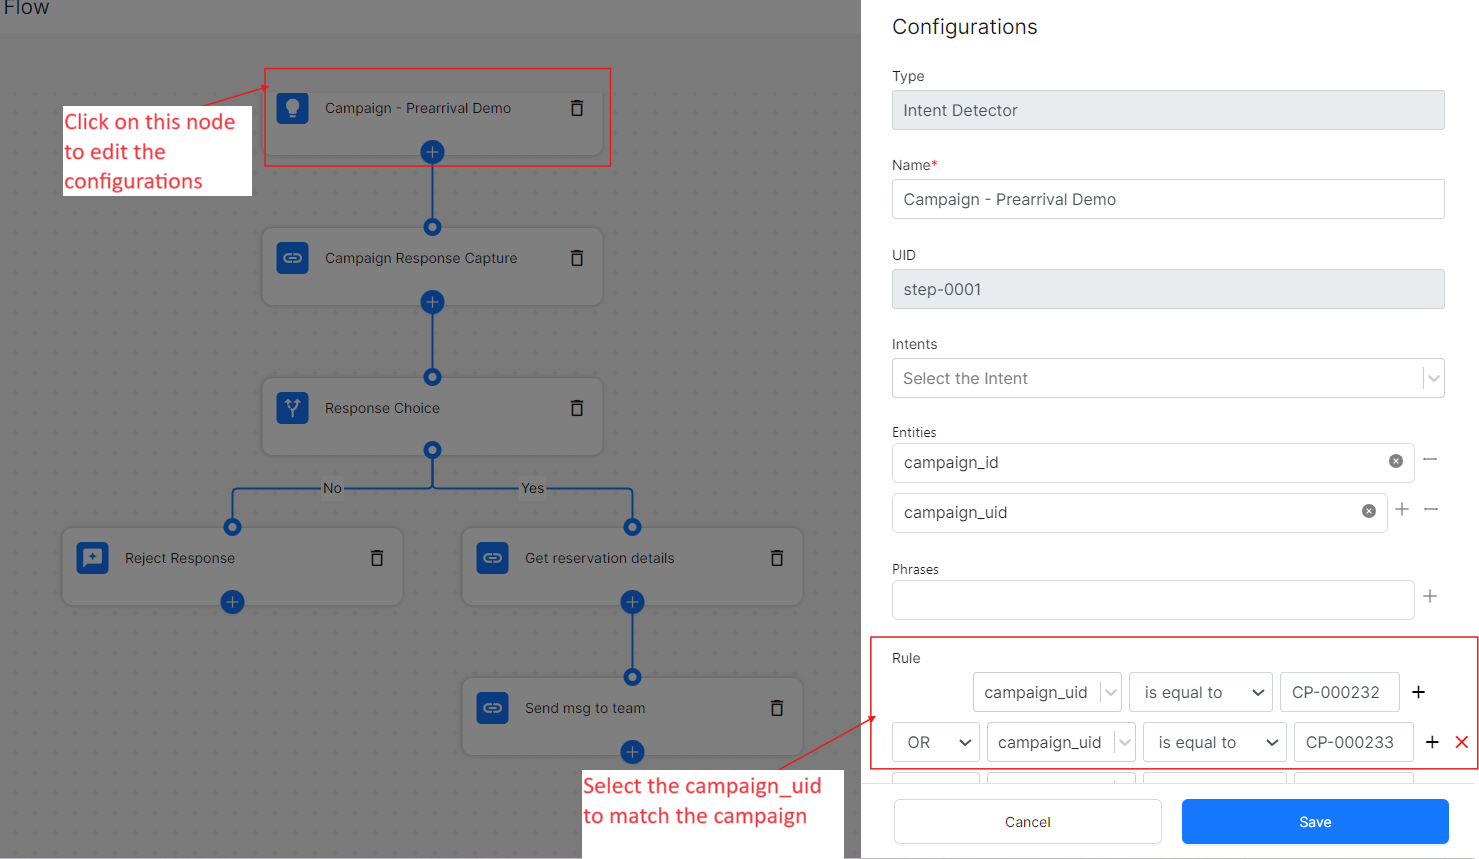
Add "OR" conditions by using the 'Campaign_uid' field and entering your campaign's ID. You can find the 'Campaign ID' after you create the campaign.
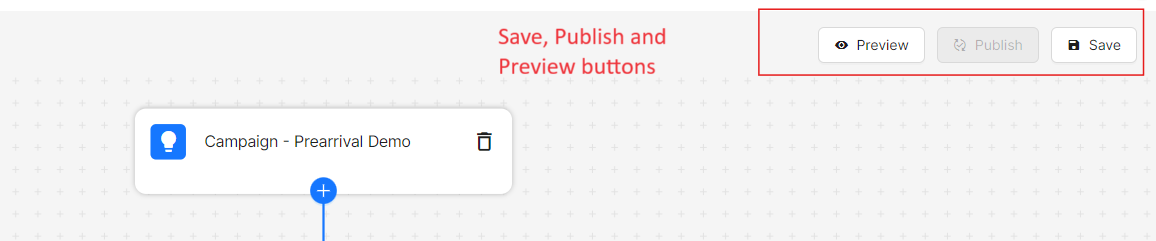
Click save and publish to apply the changes.
Ensure the response automation settings are saved and activated for the selected campaign.
Response to the Campaign
In the Responses tab, you simply decide how your customer will respond to your campaign. By default, we have Accept, Opt-out and Remind me later as the texts, you can change it according to your requirements Click on “Save & Next”.

Simulate the Campaign
Before you finalize and publish your Pre-Arrival Campaign, try out the 'Simulate' feature in Ephanti. This lets you preview how your messages will look to your guests before sending them.
To simulate the campaign:
- Choose the target groups or specific guest profiles you want to test.
- Click "Simulate". Ephanti will create sample messages based on your templates and offers.
- Review the simulated messages carefully to make sure they're what you expect and don't have any errors.
- Adjust your templates, offers, or targeting if needed based on the simulation results.
- Once you're happy with the simulation, go ahead and publish your campaign. This ensures your messages are delivered smoothly and effectively to your guests without any unexpected issues.


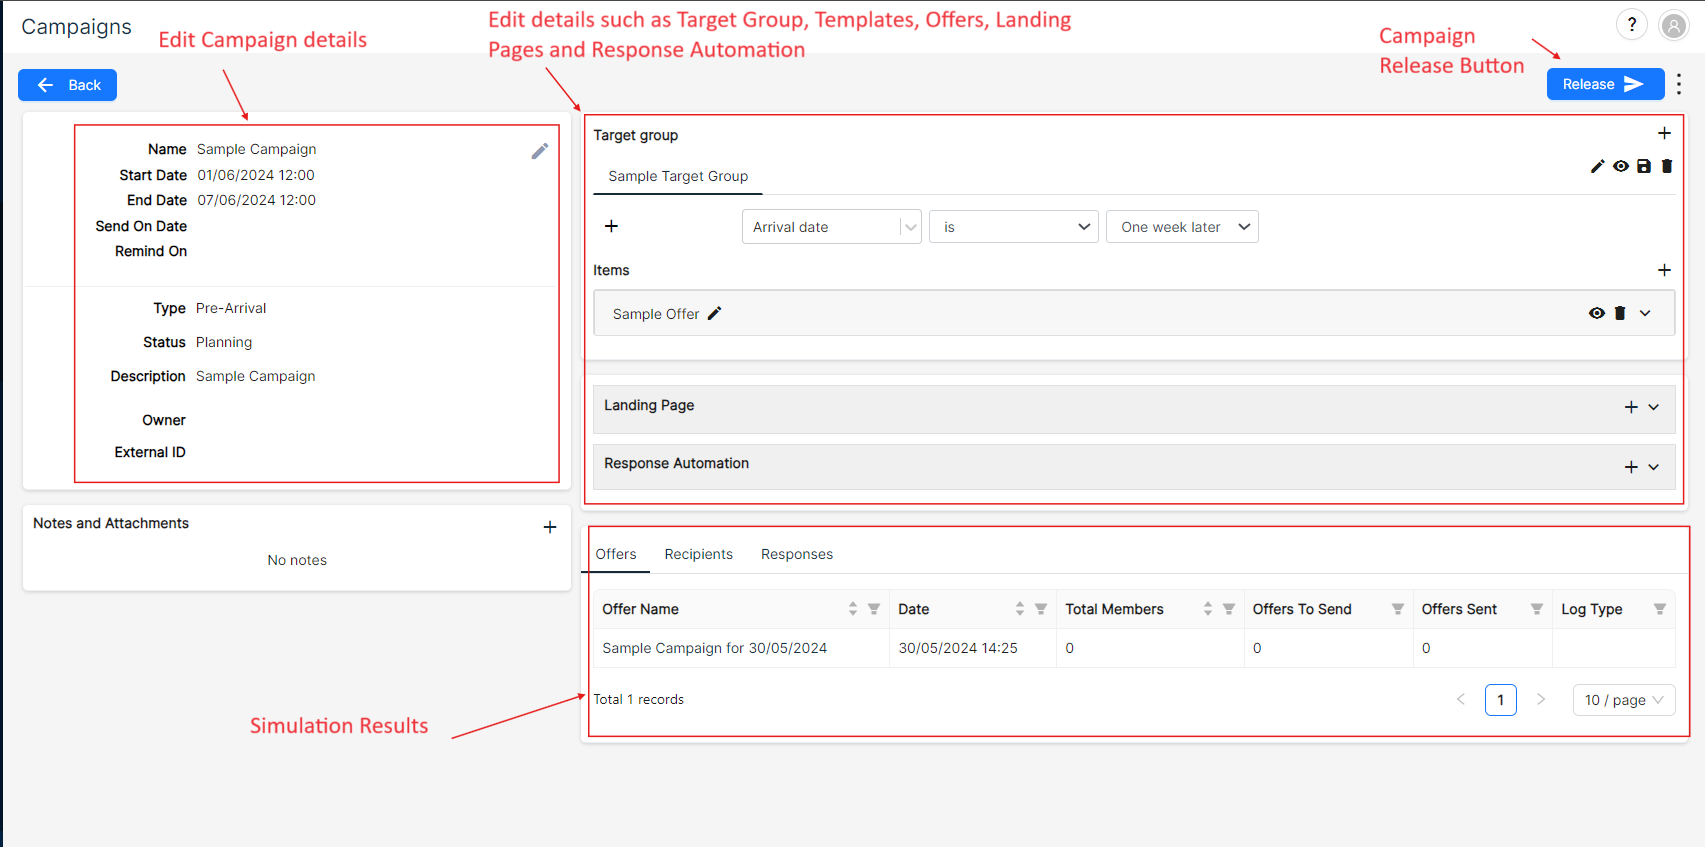
Review and Release
Review all the campaign details and configurations. Once you are satisfied, click on "Release" to activate the campaign.
You have now successfully create a "pre-arrival guided campaign".